

Quickstart
Publish your first social media post in under a minute using the CLI, MCP server, REST API, or web dashboard.
Publish your first social media post
Get from a fresh account to a published post in under a minute. Whether you use the CLI, an AI agent over MCP, the REST API, or the web dashboard, every interface uses the same authentication, request schema, and publishing workflow.
How Inklate works
Every post follows the same lifecycle:
- Connect one or more social accounts.
- Create your content.
- Validate it against each platform’s publishing rules.
- Save it as a draft, schedule it, or publish immediately.
- Track performance from the dashboard or API.
Once you understand this workflow, switching between the CLI, MCP, REST API, and the dashboard is seamless.
Before you begin
You’ll need:
- An Inklate account
- An organisation
- At least one connected social account
If you haven’t created an account yet, see Onboarding.
Quickstart (CLI)
Install the CLI, authenticate, connect a social account, and publish your first post.
npm i -g inklate
inklate auth login
inklate channels connect x
inklate posts create \
  --content "hello world" \
  --channels x \
  --scheduled-at now
These commands:
- Install the CLI.
- Sign in to your account.
- Connect your X account.
- Publish your first post.
Publishing modes
The same command supports drafts, scheduled posts, and immediate publishing.
| Command | Result |
|---|---|
--scheduled-at now | Publish immediately |
--scheduled-at 2h | Schedule two hours from now |
(omit --scheduled-at) | Save as a draft |
Automatic validation
Every post is automatically validated before it can be scheduled or published.
Validation includes:
- Character limits
- Images and videos
- Platform-specific media rules
- Channel requirements
Drafts are always saved, even when validation fails.
Scheduling and publishing only succeed when every selected channel passes validation.
Run validation without saving a draft:
inklate posts validatePublish from any interface
The CLI, MCP server, REST API, and dashboard all use the same request schema.
| Field | Description |
|---|---|
content | Post text |
channels | Destination channels |
media | Images and videos |
scheduled_at | Draft, scheduled time, or now |
The only difference is how the request is sent.
CLI
inklate posts create \
  --content "hello world" \
  --channels x \
  --scheduled-at 2h
MCP
{
  "method": "tools/call",
  "params": {
    "name": "posts_create",
    "arguments": {
      "content": "hello world",
      "channels": ["x"],
      "scheduled_at": "2h"
    }
  }
}
REST
curl -X POST https://api.inklate.com/api/v1/posts \
  -H "Authorization: Bearer inklate_XXXXXXXX" \
  -H "Content-Type: application/json" \
  -d '{
    "content": "hello world",
    "channels": ["x"],
    "scheduled_at": "2h"
  }'
Use AI agents
AI agents can connect through a hosted MCP endpoint:
https://api.inklate.com/mcpIf you don’t use MCP, every feature is also available through the REST API.
Learn more:
Publish from the dashboard
Prefer the web app? Follow these steps to publish your first post from the dashboard.
1. Sign in
Inklate is passwordless.
Sign in with either:
- Continue with Google
- A one-time email verification code
There is no password to create, remember, or reset.
Signing in with the same email always returns you to the same account.
2. Create an organisation
Every account belongs to an organisation.
An organisation contains your:
- Social accounts
- Posts
- Team members
- Billing
Use one organisation for each brand or client.
During onboarding you’ll:
- Confirm your profile.
- Name your organisation.
- Choose a subscription.
For more information, see Onboarding.
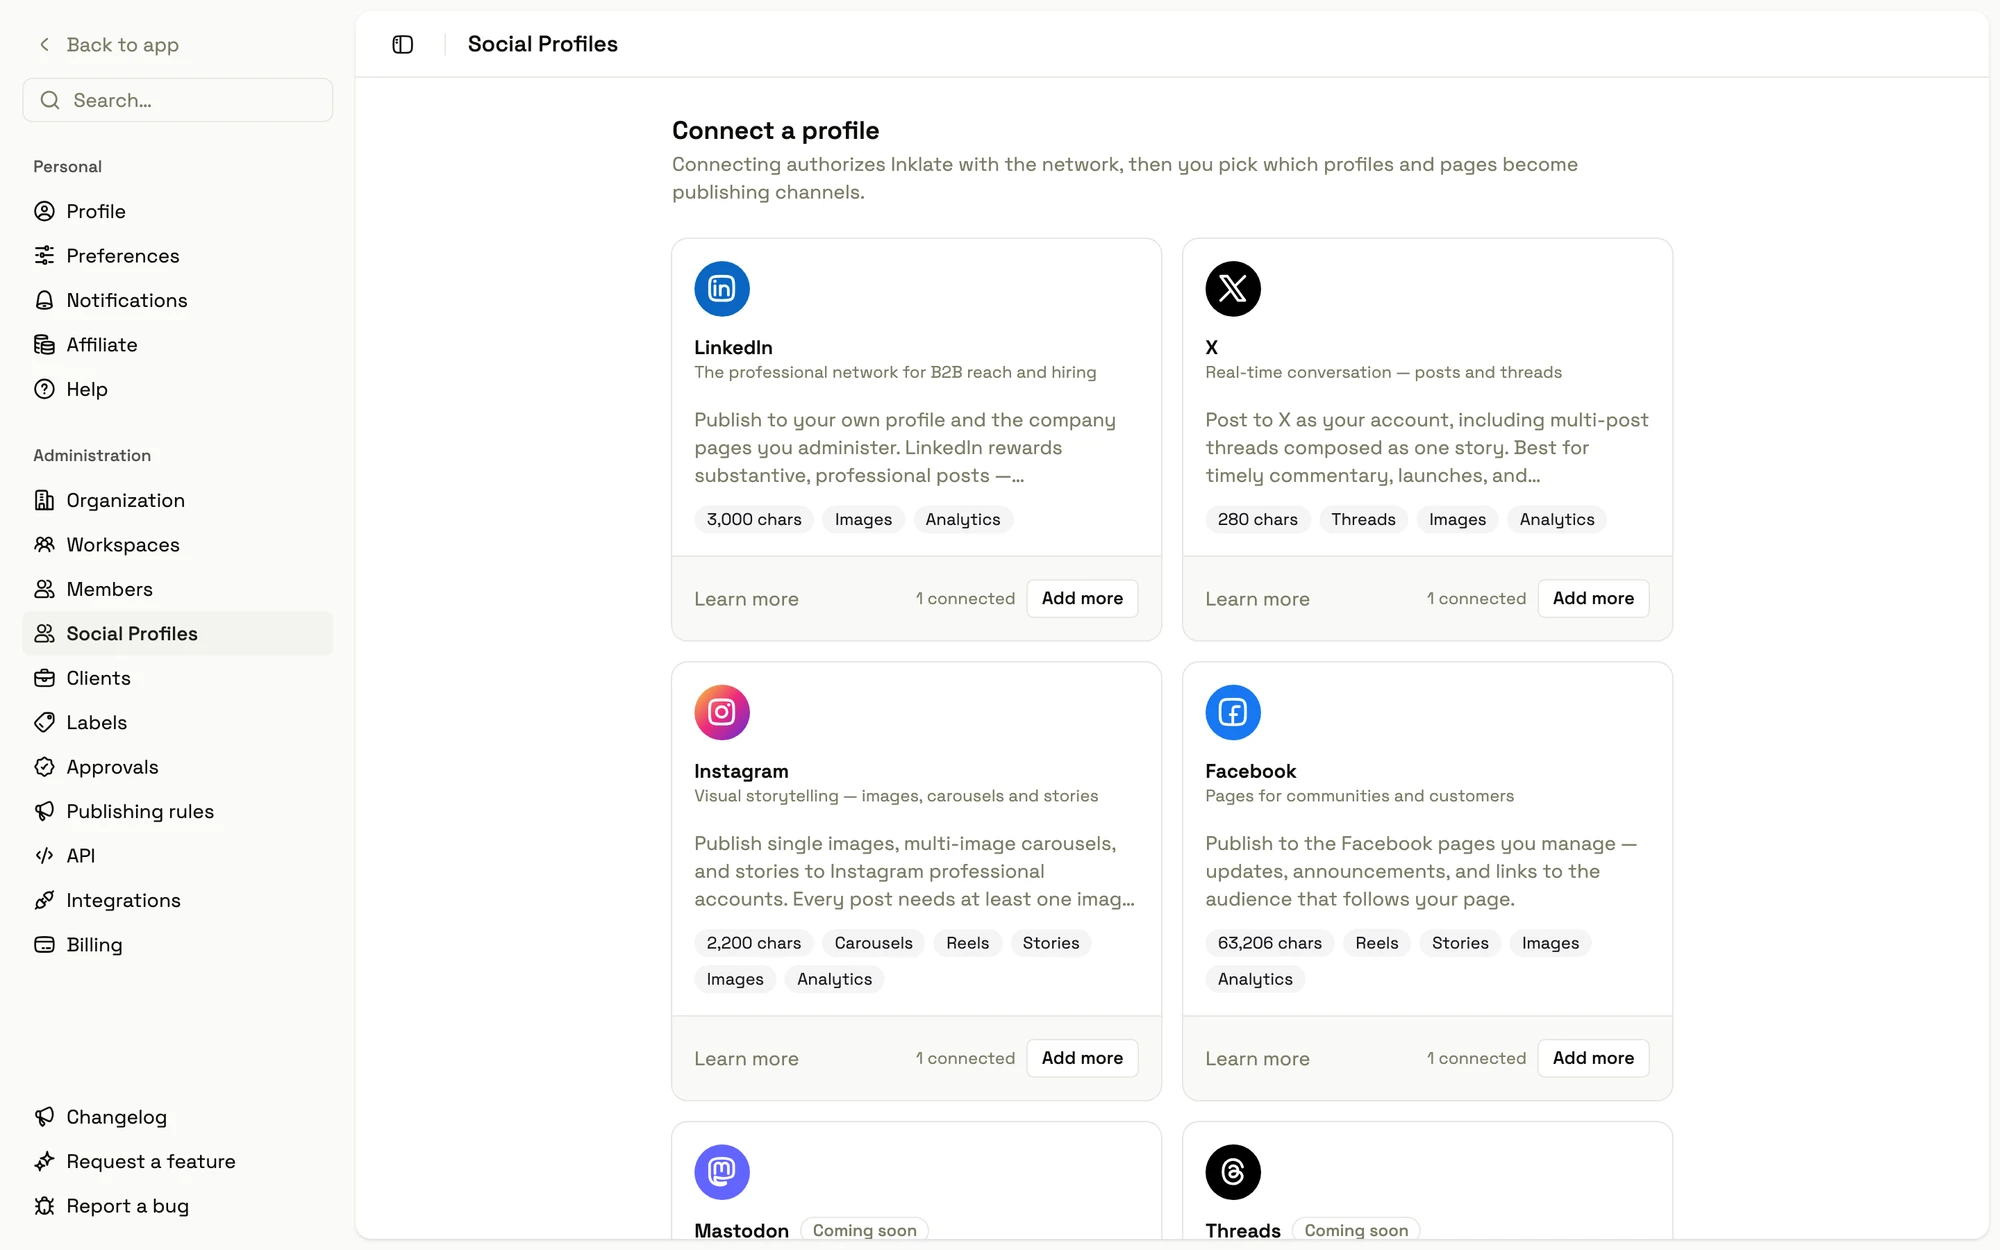
3. Connect a social account
You must connect at least one social account before publishing.
- Open Settings → Social Profiles.
- Select Connect a profile.
- Choose a platform.
- Complete the provider’s OAuth flow.
- Select the profiles or pages you want to connect.
Supported today:
- X
Additional platforms appear automatically as they become available.
4. Create your first post
- Select Create new post.
- Write your content in the Base tab.
- Add images or videos.
- Select one or more channels.
Inklate automatically creates platform-specific versions while keeping them linked.
Each channel is validated independently before publishing.
5. Publish or schedule
Choose one of two options:
- Post now publishes immediately.
- Schedule publishes at a future date and time.
Each channel publishes independently.
A failure on one platform never prevents successful publishing to the others.
After publishing, monitor status and analytics from All posts.
Next steps
Learn more about the core concepts behind Inklate or start building with AI agents.
What is Inklate?
Inklate is the social media infrastructure for AI agents. Connect your social accounts once, then let humans or AI agents draft, schedule, publish, manage, and analyse content from a single dashboard or API.
Core concepts
Learn the core concepts behind Inklate: Organisations, Channels, Stories, and Channel Copies.